
If you design printables, you know that certain types of projects require personalized information like names, initials, and unique details. When it comes to designing custom projects for paying customers, it’s easy— they send you their custom text, and you format it to the design.
But what about when you are designing a free printable, an opt-in, or something that’s going out to a large group of people, where you don’t have the opportunity to personalize each individual one?
The solution: create an editable PDF, giving the user the chance to input, and edit their custom information, while still getting the benefit of utilizing your beautiful design.
In this tutorial, you’ll learn how to:
- create an invitation in Adobe InDesign
- import pre-made graphics from Adobe Illustrator
- create fields where users can input their information
- format the fillable fields to that they match the rest of your design
What you’ll need to create your own editable PDF:
- Adobe Acrobat Pro
- A design program of your choice. In this tutorial, I use Adobe Illustrator and Adobe InDesign, but you can use any program that has the ability to export the final product as a PDF.
- Fonts. I use these free-for-commercial-projects fonts from Font Squirrel for this project: Montserrat // Nickainley // Playfair Display
- Graphics. In this tutorial, I use The Handmade Document Creator Kit, included in DesignCuts current bundle of Artistic Vector Illustrations (at 99% off, for a limited time!)
Prefer to read your instructions? Scroll on past the video!
Getting Started
Like the celebrity chefs that you might see on your favorite cooking show, I like to get all of my “ingredients” out before I start the design. In this instance, I opened a new 5×7 document in Adobe InDesign, created my color swatches that I’d be using the product, chose my fonts, and opened up all of the graphic files I’d be using, in Adobe Illustrator.
Using Pre-made Graphics
This is my go-to hack for all of my printables and design projects: always use existing illustrations and graphics, so I don’t have to create them from scratch. DesignCuts, my favorite source for fonts and graphics has made it so easy and affordable for me access the latest goodies, and ensures that my personal library is always stocked and ready for me to create.
Vectors are my second-favorite resources to use (behind fonts, of course), because they are easy to manipulate, re-color, and re-work, to the point where they look totally different from their original form.
If you happen to catch this blog post after the Vector bundle that I used, has expired, rest assured that DesignCuts has another equally awesome bundle available on their site.

Designing an invitation in InDesign
This is where you have fun! Play around with your favorite fonts and graphics to create the perfect message for your event. I’ve included the template I created, at the bottom of this post as a free download, so you’ll have it as a jumping off point.
To take graphics from Adobe Illustrator, and bring them into Adobe InDesign, all you need to do is copy + paste. Once it’s in Adobe InDesign, it’s easy to re-color and re-size to your liking.
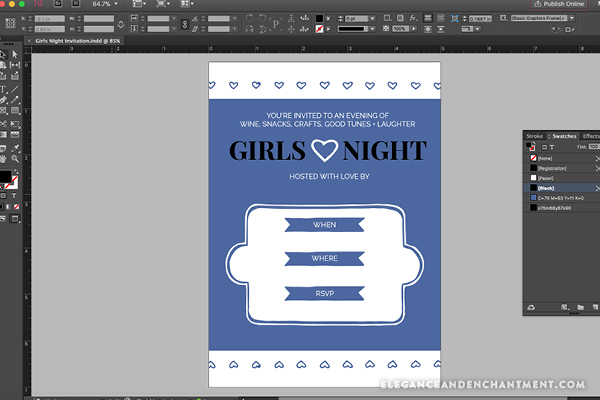
Formatting your typography
When accounting for editable fields, you don’t need to do anything in Adobe InDesign— just make sure leaving space for where that text is going to go. Any text that you include on your invitation design, in Adobe InDesign, will not be able to be changed by your user.
This is where you can play around with professional typefaces and fancy font treatments that your user might not know how to create themselves. It’s important to keep the fields that they will input to a minimum so that they don’t get frustrated or overwhelmed.
In this instance, I left the following spaces open for customized text:
– Hostess name
– Date
– Location
– RSVP
– A small note at the bottom

Creating editable fields in Adobe Acrobat
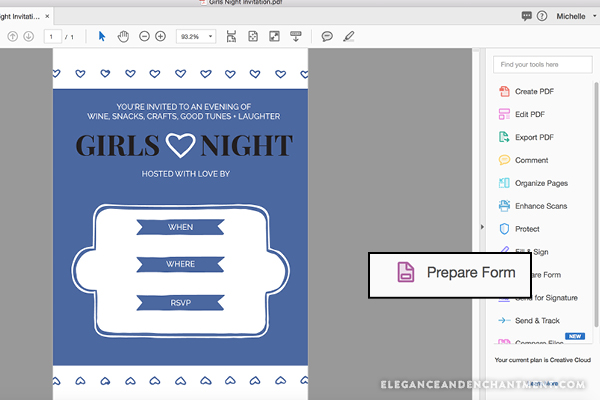
Once your invitation design is complete, export as a high-resolution PDF, and open in Adobe Acrobat.
In the toolbar on the right-hand side, click on the button that says “Prepare Form”. This will prompt you to either select the document you’re working in or to scan a new one. You’ll obviously want to select your invitation design.
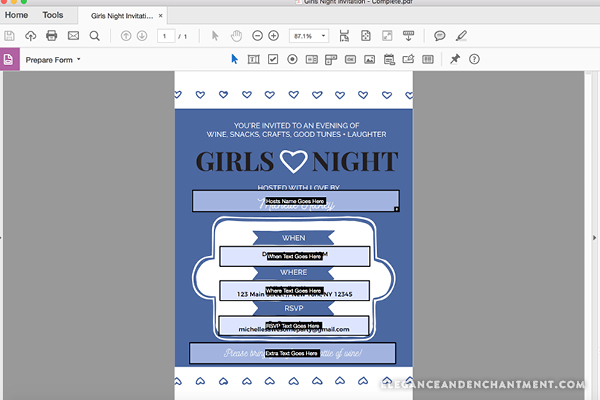
Next, you’ll want to select the text tool, located in the top bar. Drag out a text box as you would in Adobe InDesign or Adobe Illustrator. Repeat this step for all of the places where you’ll need your user to input their information.
 Formatting your editable fields in Adobe Acrobat
By default font size and choices are likely not going to fit design— but no worries— we can change that!
Double click each text box to open a dialogue box that allows you to format. Start by changing the “name” of the text field. I usually make this an instruction for the user (i.e. “your name goes here”).
If you design printables, you know that certain types of projects require personalized information like names, initials, and unique details. When it comes to designing custom projects for paying customers, it’s easy— they send you their custom text, and you format it to the design.
 IMPORTANT
If you name any of the text fields by the same name, when your user goes to type in their information, the same text will appear in all boxes with this name. For example, if you call the “When” and “RSVP” information boxes “Text 3”, when your user goes to type in “December 5th” in the “When” field, it’ll also input the “RSVP” field to read “December 5th”.
In addition to the name, for each field, I like to change the following:
Under “Appearance” tab:
- Font
- Size
- Color
Under the “Options” tab:
- Alignment
- Allow for multi-line
- Allow for rich text formatting
If you’re choosing a font that doesn’t come installed on your user’s computer (most fonts), be prepared to let them know where they can download the font that you have set them up with. I like to stick to using free fonts for this reason.
Finishing touches
To ensure that the placement and font sizes are to your liking, click on the “Preview” button, in the upper right-hand corner. This will let you view the file as your user will, and you can type in some sample type.
If anything looks off, or you haven’t left enough room to type in a reasonable amount of characters for any field, simply delete the text and switch from “Preview” mode, back to “Edit” to modify the formatting of the field.
You also may need to expand, contract, or reposition the boxes themselves, which you can do by grabbing the corners, top, bottom, or sides.
Once everything is to your liking, you can save the file— it’s good to go for your customer, client or reader.
 Last note
In this tutorial, I did not password protect my file when I exported it from InDesign. Including a password (either set in in InDesign or Acrobat) will not prohibit your user from inputting text. Just make sure that you don’t check “require a password to open the document.”
